Tuesday, December 14, 2010

Homemade Salsa {Camille}

Sorry things have been kind of slow on here recently. Abby and I have been busy bees! To make it up to you, here is one of our favorite recipes for homemade salsa! This is *so* much better then the sala from the store! :)

Ingredients:

Half a can of diced tomatoes {we use a 14 ounce can}
Two tablespoons diced jalapenos
about 1/4 teaspoon cajun seasoning {a little of this stuff goes a long way! lol!}

Directions:

Put all the ingredients in a small bowl and mix them up! It's as simple as that! {Note: When adding the cajun seasoning, you might have to season to taste a little bit....our family likes spicy salsa!}

Let me know if you try it! :) I'd love to hear how it turned out!


Sunday, December 5, 2010

Here's a Quick-Tip For Ya! (Abby)

Sorry we haven't been posting any recipes lately. There were a lot of votes for the cream puff recipe, actually one of my recipes, so that one will be up before you know it! (Well... sorta...)

Today I, sadly, don't have a recipe for you either, BUT I do have a really quick tip I find helpful. (:

You know my latest recipe, the chocolate chip cookies? Well, ya know how if your making a lot of cookies, around 100 or more, it gets kinda hard, and time consuming, to scoop each individual cookie. You are constantly taking pans out of the oven, putting them in, putting the cookies on cooling racks and scooping on more cookie dough. You are literally in the kitchen for hours, not to mention the countless times you scoop on cookies and take them off. Believe me, I've made 300 cookies all at once before (I told you I make a lot of cookies... every one is always asking me to make cookies, so I'm always making them.)

It is very time consuming and tiring to do all that. Especially if you are cooking a meal before that - you don't wanna spend another 2 hours working in the kitchen after that, do you? (Unless you are a robot, you are answering NO.)

SO... you should be happy you are reading this post right now! This doesn't work for all cookies out there, but it especially works good for chocolate chip cookies.

Start by spraying a regular sized cookie sheet with some oil or cooking spray. Next take the dough (if you are doubling it, take half of the dough, tripling it take a third of the dough, and so on and so forth) and start spreading the dough out.

This is where it gets a little tricky and you really have to work with it. You could even pop the dough in the microwave for just a few seconds, 10 at the very most, to warm it up a bit more. This makes it easier to spread. I like to use rubber spatulas for this part.

If your doing this at the moment, then you have already experienced the dough not wanting to spread, and also you'll pick up the dough with your spatula/spoon, and you'll really only have a big dollop of dough in the middle of your pan.

I suggest spraying the spatula/spoon with some oil before starting, and also taking small parts of the dough and spreading them at a time - don't plop the whole thing down at once and try to spread it from there.

You can also do this on a round pizza pan to make a cookie cake, then decorate it with some icing and there you have it - a really cute, really good, really fast cake! Perfect for those who don't exactly desire cake. We usually do this for one of us kids birthdays, because we're all in August, except for one in July. My birthday comes last, and we're all usually sick of so much birthday cake that we just make a cookie cake instead.

Ok, so you've put all the dough on the pan, cooked it on 375 for about 20 minutes (make sure to keep a close eye on it though!), now what?

Easy-peasy. Let it cool down a bit before doing this. Just take a knife (be careful not to scratch your pan!) and cut the cookie in to smaller bars.

A few days ago I was cooking cookies for about 50-60 people, and all I did was double the recipe and spread (with my moms help... I couldn't for the life of my spread it out. I think I started it out wrong. LOL) out the dough on to two cookie sheets, and cooked them separately. After that I just cut them in to bars, and voila! You've got really good cookies, that didn't take any time at all, and hardly any time in the kitchen! Love it.


 Hope you enjoyed and found this helpful. Remember, you can always send us an e-mail of yours if you made them! *wink* Have a great week and God bless!

howdoweboilwater.email@gmail.com

Wednesday, November 17, 2010

World Famous Chocolate Chip Cookies (Abby)

Hahaha, no, I don't call them that... my dad does.  But, they are SUPER easy (I'm not just saying that) and pretty good, if I do say so myself. (; (Btw, I believe this recipe came off of a Sam's Club chocolate chip bag.) I have made this recipe sooo many times that I never get out the written recipe because I've memorized it! Lol. Let's get to it!


First you'll need:

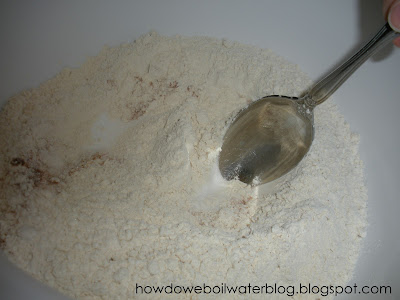
2 1/4 cups of flour
1 tsp. salt
1 tsp. baking soda

Mix it all together in a separate bowl and set aside.


This is the auto-mixer I'm using. You can use a hand mixer if you want. I've used both, but this one is obviously easier. (; It's a 'Bosch.' I'm not sure where we got it, but it's a really good one. (:


Here are the attachments I'm using. I don't think this really matters, but I thought I would mention in case it does or you just wanna know.


In the mixer, mix:

3/4 cup granulated sugar
3/4 cup brown sugar
2 sticks of butter (1 cup)
1 tsp vanilla


Then add 2 eggs and mix!


Next mix in the dry ingredients you mixed earlier. I like to put in about half of the flour mixture, mix it in, and then add the other half. The recipe doesn't say this, but I do because I feel like it mixes up a bit better.


.Next add in the chocolate chips! I add about 1 1/2 to 2 cups. You can add in nuts now if you want to. I don't, but if you like yours with nuts you can. :D


 YUM-O. Hehe, I think I say this with about every recipe I've posted... *rolls eyes*


I use a cookie dough scoop (yes, I make so many cookies that I actually have a cookie scoop... kinda like an ice cream scoop.... but for cookie dough). My scoop is about 1 inch, I believe, so you can just use like your regular spoon and make them round if you don't have a cookie dough scoop.


I put them about two inches apart, or 12 cookies on a regular sized cookie sheet.


Bake for 10-12 minutes (watch them, because sometimes it takes less and sometimes more depending on the oven) in a 375 degree oven.

I have doubled, and even tripled, this recipe and it comes out the same. (: When I make just one recipe, it makes aprox. 34 cookies, or around there. When I triple it it makes about 120 cookies. Once I did this, and I cooked them all at one time (when I make this much I usually just cook a few batches and then put the rest in the fridge for another time) I was in the kitchen for HOURS and I finally came out with about 120 cookies! lol! 

Btw, I don't recommend cooking 2 cookie sheets at a time. I put one in at a time, not both in at the same time. I don't think they would cook very evenly if you put them both in there at once.


 ... I saw that...


Here's the recipe (:

________________________________________________

Chocolate Chip Cookies

2  ¼ cups all purpose flour
1 teaspoon salt
1 teaspoon baking soda
¾ cup brown sugar firmly packed
¾ cup granulated sugar
1 cup softened butter
1 teaspoon vanilla extract
2 eggs
1 package semi-sweet chocolate chips (12oz)
1 cup chopped nuts (optional)
Preheat oven to 375 degrees.  Combine flour, salt and baking soda in bowl and set aside.  Combine brown sugar, granulated sugar, softened butter and vanilla and beat until creamy.  Add eggs and beat.  Add dry ingredients and mix well.  Stir in chocolate chips and nuts (if desired).  Drop mixture by rounded teaspoonfuls onto ungreased cookie sheets.  Bake 10 minutes.

Friday, November 12, 2010

Pumpkin Pancakes (Camille)

Okay, by now your starting to notice a trend on this blog. First we had Blueberry Muffins, then Waffles, then a amazingly yummy Pumpkin Roll, Banana Muffins, and now Pumpkin Pancakes. Yes, we are more into desserts and breakfasts, but I might be posting a dinner recipe soon (*wink*).

Here are some really yummy Pumpkin Pancakes that I made this morning for breakfast. Our family loves anything with pumpkin, so they loved these (as usual). If you have a larger family (which is unlikely, I don't know very many families that are larger then ours) you could double this recipe easily.

Okay, here's the recipe!

Ingredients:

2 cups flour
3 tablespoons brown sugar
1 tablespoon baking powder
1/2 teaspoon cinnamon
1/4 teaspoon allspice
1/4 teaspoon ginger
1/4 teaspoon nutmeg
1 teaspoon salt
1 1/2 cups milk
1/2 cup canned pumpkin (or pumpkin puree)
1 egg
2 tablespoons cooking oil (or melted butter) plus butter for serving
tons of maple syrup for serving (what can I say? I like a little pancake with my syrup)

**********************************************

Okay, start by getting everything you'll need together. Get out all of the ingredients (duh) 2 medium bowls, and a griddle (or frying pan).

Now you're ready for the fun part!! :) Start by mixing up all the dry ingredients (make sure you measure the sugar and spices correctly because that is very important to this recipe).


Now whisk up the wet ingredients (I used a fork).


Okay,  gradually add the dry ingredients to the wet ingredients (remember to do it gradually), and mix until combined. The batter should be a little lumpy.


While you were mixing all that tasty goodness together, your griddle should have been preheating. To make sure it is hot enough take a drop of water and throw it on, if the water sizzles then you are ready to start cooking your pancakes! Use a 1/4 cup measuring cup and spoon them on.


While they are cooking heat up your syrup (we always put it in a mug in the microwave for 60 seconds).  There's a picture of our dirty microwave (it's well used. ;D).

Go back to your pancakes and turn them to the other side.


Make sure they are cooked well (they should all the light brown) before transferring them to a plate. As you can see, I just had to taste one of them......*grin*.


Here's a picture of  my yummy breakfast. I ate my pancakes with two eggs to add some protein. :D Hope you enjoy these!! I know I did!


P.S. If you made this, or any other recipe on here, please email us and let us know how it turned out (and send pictures!) our email address is howdoweboilwater.email@gmail.com.

Sunday, November 7, 2010

Easy Hawaiian Banana Bread (Abby)

This is one of my favorite banana bread recipes! It's so easy you won't believe it.... well you might, but it's like seriously super easy. It's even more good with homemade cream cheese icing! You can use the recipe I used in my Pumpkin Roll recipe, if you want. (:


First off, I know this doesn't look like banana bread! We like to put them in shape of muffins because their easier to tell when their done and their also easy because you don't have to slice it in pieces - just grab and go! I know, we're like really lazy at times. :P Aren't we all?

Yield: 2 loaves or about 38-40 muffins.


 Start out with:
3 cups all-purpose flour (I used un-bleached wheat flour and they turned out fine)
3/4 tsp salt
1 tsp baking SODA
2 cups sugar
1 tsp ground cinnamon

 Mix together (just with a spoon.)


Whisk together your eggs in a separate bowl. I just used a fork, but you can of course use a whisk.


I'm not sure if it matters or not, but these are pineapples I used. Make sure to get the CRUSHED pineapples, unless you want to chop them up yourself. (Which you can easily do in a food processor, it just adds an extra step.) Since ours was a 20-oz can, I put about half of it, since half of 20 is 10, which is around 8. (I'm sure you had to be told that....) It doesn't half to be EXACT.


Combine:
1 cup vegetable oil
3 eggs, beaten
1 cup chopped pecans or walnuts (optional)
2 cups mashed ripe bananas (thanks to my banana-mashers, Amelia and Mattie)
1(8-ounce) can crushed pineapple, drained
2 tsp vanilla extract

 Yes, this looks disgusting, just bear with me here.


Stir it up!


And add to your dry ingredients. Stir it just enough so the dry ingredients are moistened.


If you want to make them as muffins, put cupcake liners in muffin pans. This step is optional, but it's so much easier to get them out afterward, and also clean up is really quick & easy. (Which are two of my favorite words in cooking.)

Alternative: If you want to make this in to loaves, not muffins, grease and flour two 8 1/2 x 4 1/2 x 3 inch loafpans.


Fill the liners to about 2/3 full.


Bake them in a 350 degree oven. Mine took aprox. 20 minutes. Keep an eye on them, because the times will vary and like I said that was just an estimate. (If you are baking them in loaves, bake at 350 for 1 hour and 10 minutes or until a toothpick inserted in the center comes out clean. It's a little bit tricky to know when it's done in the middle, so make sure you know for sure that it's done before taking it out.)


Since some of us like walnuts on ours (me not being that person) my mom sprinkled some on top right before putting them in the oven. My mom said that they were better, because they got roasted since being on top. You can of course mix them in, or you could mix the nuts in *and* put them on top!)

Yum-O


Amelia liked them too.


Here's the recipe in case you want to print it off or whatever. (:

______________________________________________________

3 cups all-purpose flour
3/4 tsp salt
1 tsp baking soda
2 cups sugar
1 tsp ground cinnamon
1 cup vegetable oil
3 eggs, beaten
1 cup chopped pecans or walnuts (optional)
2 cups mashed ripe bananas
1(8-ounce) can crushed pineapple, drained
2 tsp vanilla extract

Combine first 5 ingredients; stir in pecans (or walnuts). Combine remaining ingredients; add to flour mixture, stirring just until dry ingredients are moistened. Spoon batter into 2 greased and floured 8 1/2 x 4 1/2 x 3 inch load pans. (Or in to lined cupcake/muffin pans.) Bake at 350 degrees for 1 hour and 10 minutes (for muffins, bake for aprox. 20 minutes) or until wooden pick is inserted in center comes out clean. Cool in pans 10 minutes; remove from pans, and let cool on wire racks. Yield: 2 loaves or about 38-40 muffins.